 It's never going to be perfect. The platform was level, the wall was plumb... but then the knee brace began to sink (a bit), and the wall started to tilt. While it's not a structural problem, all the angles and distances go off, and you're left trying to compensate with the siding, roof, trim, etc. What to do? The solution ended up being "racking" the wall back to near-plumb and keeping it there with a screwed in 2x4 (in the photo). Great idea by Andrei (my niece's husband), who with my brother-in-law Don, helped with the solution. Once all the walls were up and screwed together, the fix held. Now the brace is off, and the platform is still a bit dippy at the furthest corner. There's accumulated water with every rainstorm, but now I got the roof and siding up. It's manageable and in the end, you can barely tell without rolling a marble across the floor ;) With treehouse construction, you learn a little flexibility - not a bad lesson in life....
Monday, November 28, 2016
Righting the wrong
It's never going to be perfect. The platform was level, the wall was plumb... but then the knee brace began to sink (a bit), and the wall started to tilt. While it's not a structural problem, all the angles and distances go off, and you're left trying to compensate with the siding, roof, trim, etc. What to do? The solution ended up being "racking" the wall back to near-plumb and keeping it there with a screwed in 2x4 (in the photo). Great idea by Andrei (my niece's husband), who with my brother-in-law Don, helped with the solution. Once all the walls were up and screwed together, the fix held. Now the brace is off, and the platform is still a bit dippy at the furthest corner. There's accumulated water with every rainstorm, but now I got the roof and siding up. It's manageable and in the end, you can barely tell without rolling a marble across the floor ;) With treehouse construction, you learn a little flexibility - not a bad lesson in life....Saturday, November 26, 2016
Curved wall - part 2
 After attaching the studs to the curved bottom plate, I used some plastic pieces nailed to the inside (larger radius) side of the wall to keep it together. This was how I was able to hoist it up onto the platform from the ground below. Once up on the platform, I hand-cut beveled siding pieces to connect adjacent studs. I love the effect! It looks like armadillo scales, which is kinda cool, but alas, these scales will remain invisible, since they face the oak tree on the exterior side of the wall. The photos show the process before i attached the wall to its adjacent neighbor walls... Thanks to Nadia for helping keep the studs in line :)


The curved wall – part 1
 Probably the most challenging wall of the whole
project was the curved wall that went around the main oak tree. Figuring out
how to make this was a process, especially with the gabling and curved helical
section on the top part – which never really did get figured out. Spent some time with trigonometry calculations, which was fun but ended up being useless - probably needed to work with 3D helical sections... For the bottom I ended up cutting two
copies of a circular arc out of ¾” plywood, put them together, and that was the
bottom plate… as you see in the photo. For the top, well... approximating stud to stud, shaving down some 2x4's here and there... it came together in the end ;) Hey, the roof's pretty light!
Probably the most challenging wall of the whole
project was the curved wall that went around the main oak tree. Figuring out
how to make this was a process, especially with the gabling and curved helical
section on the top part – which never really did get figured out. Spent some time with trigonometry calculations, which was fun but ended up being useless - probably needed to work with 3D helical sections... For the bottom I ended up cutting two
copies of a circular arc out of ¾” plywood, put them together, and that was the
bottom plate… as you see in the photo. For the top, well... approximating stud to stud, shaving down some 2x4's here and there... it came together in the end ;) Hey, the roof's pretty light!Slowing down
 Some walls need to go up as a finished product. These are
the walls that wrap around the oak tree and, once up, I’d have no way to get at
their exterior, put up siding, etc. This meant that not only did the wall need
to be framed on the ground, but the siding needed to be nailed up and stained
prior to hoisting the wall and screwing it to its neighbors and floor. This
really slowed things down for obvious reasons… but there was really no other
way I think. (mom approves, by the way ;) )
Some walls need to go up as a finished product. These are
the walls that wrap around the oak tree and, once up, I’d have no way to get at
their exterior, put up siding, etc. This meant that not only did the wall need
to be framed on the ground, but the siding needed to be nailed up and stained
prior to hoisting the wall and screwing it to its neighbors and floor. This
really slowed things down for obvious reasons… but there was really no other
way I think. (mom approves, by the way ;) )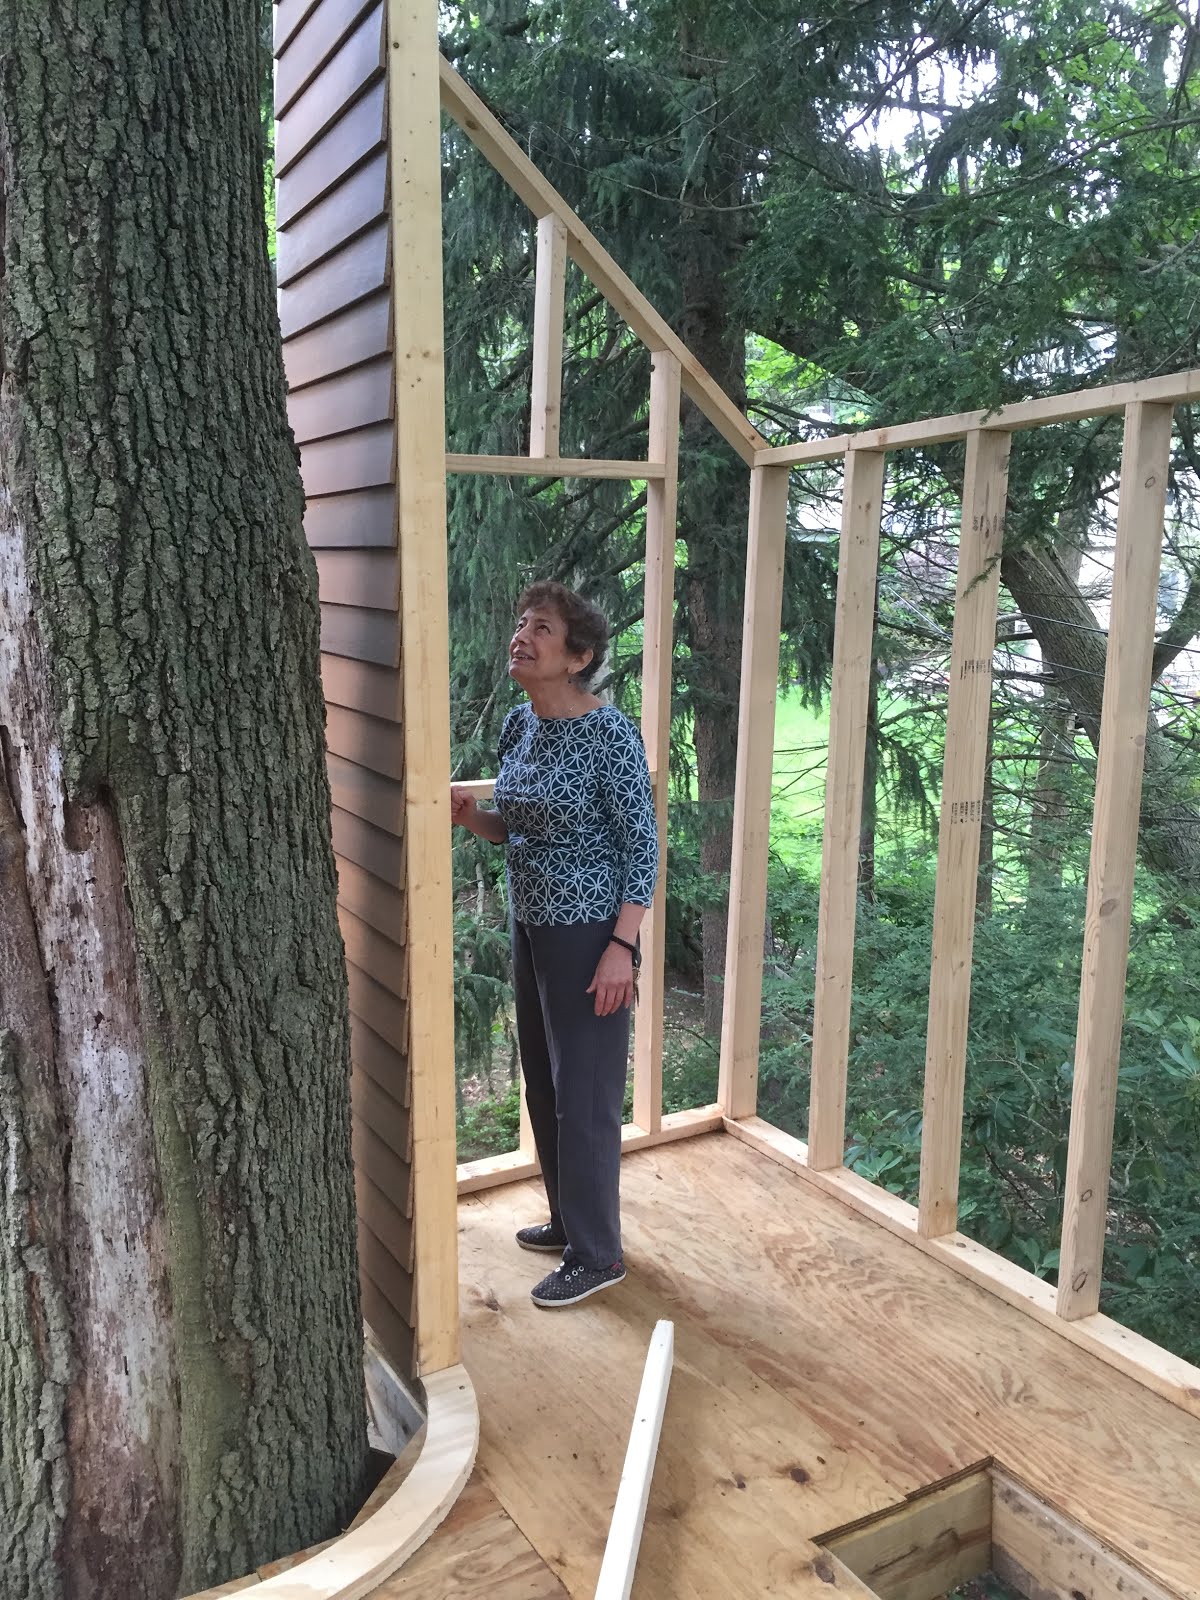
Structural engineering consult
One of my joys in building this treehouse when I did was
having my mom and dad close by (they had recently moved to the area) so they
could swing over and look over the progress. My father was a structural
engineer and loved checking over all the beams under the treehouse, supporting
the platform. Fun for us both... (yeah, yeah, my selfie techniques need some more
work)

Getting by with a little help from my friends
 While some of the walls I could push up onto the platform
myself, others required two able-bodied lumberjacks to hoist them up, or place
into position before screwing them down. My local Norwegian friend, Dan-Mikael,
was more than happy to assist in such badassery, and lived down the street… It
didn’t take a lot of his time, but in key moments his help was invaluable.
While some of the walls I could push up onto the platform
myself, others required two able-bodied lumberjacks to hoist them up, or place
into position before screwing them down. My local Norwegian friend, Dan-Mikael,
was more than happy to assist in such badassery, and lived down the street… It
didn’t take a lot of his time, but in key moments his help was invaluable. Framing the walls… the treehouse starts to take shape
 Once the walls started to get framed out and hoisted up onto
the platform, it really started to feel like a treehouse was finally coming
together. The first wall (pictured here) which was planned for the south side
was built with nails. In retrospect I should have used exterior-grade screws,
as I did with all the other walls – it would have been easier, faster to build
square and by the time I finally got the roof over it, the nails were starting
to rust. Oh well… Some people advocate building the walls up on the platform
itself so you don’t need to hoist the walls up, while others suggest building
them on the ground with lots of space all around, and then hoisting them up. As
it was, my footprint was pretty small, so once one wall was up, I really couldn't build too many others, plus I had removed my pulley system before the previous
winter and never got it set up again, so…. I did most of the wall construction
down on the ground.
Once the walls started to get framed out and hoisted up onto
the platform, it really started to feel like a treehouse was finally coming
together. The first wall (pictured here) which was planned for the south side
was built with nails. In retrospect I should have used exterior-grade screws,
as I did with all the other walls – it would have been easier, faster to build
square and by the time I finally got the roof over it, the nails were starting
to rust. Oh well… Some people advocate building the walls up on the platform
itself so you don’t need to hoist the walls up, while others suggest building
them on the ground with lots of space all around, and then hoisting them up. As
it was, my footprint was pretty small, so once one wall was up, I really couldn't build too many others, plus I had removed my pulley system before the previous
winter and never got it set up again, so…. I did most of the wall construction
down on the ground.
Subscribe to:
Posts (Atom)