 All the while, the twins and their friends were able to climb
up and hang out (without getting too rambunctious). I think in general they
understood the potential danger pretty well, so kept their play mellow.
Sometimes we just climbed up to eat lunch or even read a book...
All the while, the twins and their friends were able to climb
up and hang out (without getting too rambunctious). I think in general they
understood the potential danger pretty well, so kept their play mellow.
Sometimes we just climbed up to eat lunch or even read a book...Saturday, November 26, 2016
Hanging out
All the while, the twins and their friends were able to climb
up and hang out (without getting too rambunctious). I think in general they
understood the potential danger pretty well, so kept their play mellow.
Sometimes we just climbed up to eat lunch or even read a book...
Something to stand upon
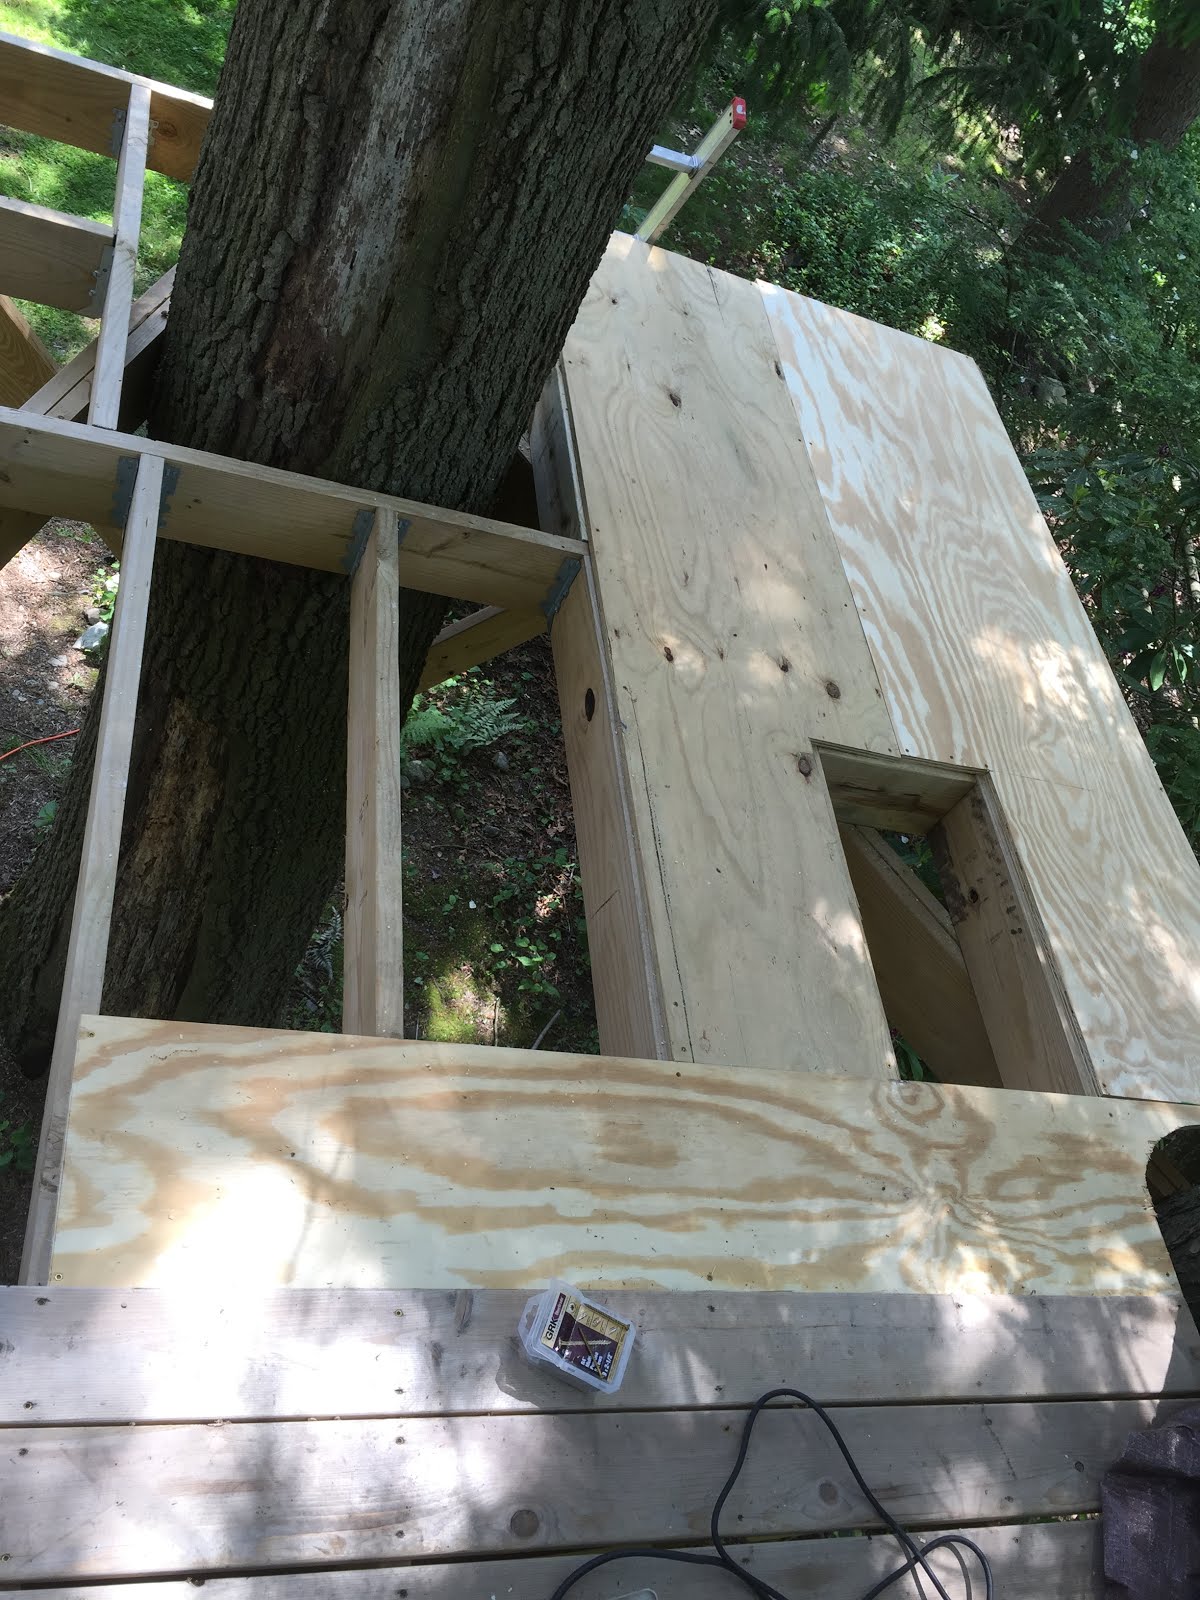 When building the deck, I was basically balancing on top of
the platform joists. Once the deck and railing were finished, it was time to
get to the floor (subfloor actually). I mostly used exterior grade ¾” plywood
for this, patching together the U-shaped footprint for the treehouse. I tried
to span multiple joists if possible for more stability. In the photo, you can
readily see the hole for the trapdoor :)
When building the deck, I was basically balancing on top of
the platform joists. Once the deck and railing were finished, it was time to
get to the floor (subfloor actually). I mostly used exterior grade ¾” plywood
for this, patching together the U-shaped footprint for the treehouse. I tried
to span multiple joists if possible for more stability. In the photo, you can
readily see the hole for the trapdoor :)
Wednesday, November 23, 2016
Client-centered Design
 I asked the twins what 1 thing they wanted most for the
treehouse. Nadia: “I want a swing.” Kai: “I want a trapdoor.” Ok, I can do
that. The swing we already had somewhere else so I just moved it to the
treehouse… it gets pretty regular use, especially when Nadia’s friends come by.
The important thing is to keep the area from getting too cluttered with nails,
screws, tools, scrap wood, whatever else is lying around. It’s a good excuse to
remember to clean up at the end of a work day. The trapdoor, well, that’s been
on the backburner so far. The blocking is there, the location set, but I
haven’t constructed it yet – it’s kind of nice to have a hole in the floor. All
kinds of leaves, sticks, pine cones, rain water accumulate
I asked the twins what 1 thing they wanted most for the
treehouse. Nadia: “I want a swing.” Kai: “I want a trapdoor.” Ok, I can do
that. The swing we already had somewhere else so I just moved it to the
treehouse… it gets pretty regular use, especially when Nadia’s friends come by.
The important thing is to keep the area from getting too cluttered with nails,
screws, tools, scrap wood, whatever else is lying around. It’s a good excuse to
remember to clean up at the end of a work day. The trapdoor, well, that’s been
on the backburner so far. The blocking is there, the location set, but I
haven’t constructed it yet – it’s kind of nice to have a hole in the floor. All
kinds of leaves, sticks, pine cones, rain water accumulate Tuesday, November 22, 2016
Finishing the deck with railings
 Next up were the railings. I was toying with the idea of doing something funky with branches, but it's not so easy to get cedar branches on the East coast, and special ordering them is expensive. Just couldn't figure out a source... So in the end, I went with a more conventional design, a bit more to code, with narrow spacings between balusters and a flat rail on top using decking. One mistake I think I made was to just lay the top railing flat instead of slightly angling it - harder to put a drink on it, I know, but when flat it's been accumulating water from rain and starting to turn green after only half a year... I'll coat it with some waterproof decking coat, so maybe that'll deal with the problem...

Not sure if it's easy to tell, but I ended up cutting the vertical balusters a little to make like a window through which one of the hemlock branches escapes. I really wanted to limit how many branches I cut off, and build around the trees as much as possible. In fact that was the principle of the U-shaped design for the treehouse, to work around the big oak tree that anchors the entire project.

Monday, November 21, 2016
Spring brings a deck
 As the snow melted away, it was time to start filling in the platform. First order of business - a deck. proper deck, with cedar decking. Cedar is really the perfect treehouse material (but more expensive than alternatives), as it's relatively water/rot resistant and so so light. I also used 4x4 cedar posts for structural support of the the railing. Getting these level and plumb was a bit tricky, but some shims helped for when the platform was a bit twisted...
Saturday, October 22, 2016
Winter is here... 2015
At this point, after I got the platform built, I stopped work for the winter. I didn't want to build up the flooring over the platform and have the snow pile up. Better to have snowflakes flutter between the joists, otherwise I'd have to climb up and shovel the snowpack off after every snow storm, trying to keep the plywood from rotting, etc.... so, I kept the platform unencumbered for the winter and just watched the snow settle on the beams for a few months, enjoyed some time off to spend with D and the twins. It turned out to be a fairly easy winter, especially compared to the record breaking 2014-1015 winter where we got around 110' of snow.
 Time is always precious, and I didn't want to spend all my free time working on this treehouse. You have to find a balance, get what you can done when you have the time, but also not spend all your free time working - otherwise you can burn out. On the other hand, the binge-building approach allows you to get it finished faster, and if I could have just taken a month or two off of work and worked on this full-time, it wouldn't have turned into a 2+ year adventure... but like I said, to be a contemplative treehouse, you need the time to contemplate ;) also, for the amateur, time off to research decisions, construction approaches can't be shortcut - at least for me, just throwing something up wouldn't have worked.
 Time is always precious, and I didn't want to spend all my free time working on this treehouse. You have to find a balance, get what you can done when you have the time, but also not spend all your free time working - otherwise you can burn out. On the other hand, the binge-building approach allows you to get it finished faster, and if I could have just taken a month or two off of work and worked on this full-time, it wouldn't have turned into a 2+ year adventure... but like I said, to be a contemplative treehouse, you need the time to contemplate ;) also, for the amateur, time off to research decisions, construction approaches can't be shortcut - at least for me, just throwing something up wouldn't have worked.
Winter is coming... 2015
By September/October, 2015, after getting all 3 support 2x10's up and level, it was time to build the platform. I went with 2x8's for the platform, which should provide enough strength for the relatively modest 1-story treehouse. I built the platform in place over the supports, not on the ground. Seemed easier to do this, using ladders and such, than trying to haul up a pre-built platform with the pulley system. As it turned out, I think it didn't end up perfectly square because of this - which i retrospect created some problems down the line, but over all turned out "good enough." Thats one thing about tree houses thats different from regular home construction - a little out of plumb, non-level, and off-90deg is fine for a treehouse - it's not supposed to look like a cookie-cutter suburbia house up in the trees. So a personalized touch is all the better as long as it doesn't adversely effect structural stability and safety, of course... Thats why I stay clear of major projects in my own house! thats where it does have to be square and plumb and perfectly level :)
 So, as you can see I extended out two of the side joists purposefully, thats was to better attach posts for the front deck and provide some support in case I decided to cantilever out a support for a drop-bucket or some other fun thing to have off of the porch. Also, you can still see the pulley up and operational on this photo. I used the pulley line to hold up the long side joists so I could screw them in place by myself. It's definitely something that with 2 or 3 people could have been done without a pulley, but as I pretty much worked solo on this, I was always coming up with different ways to get pieces where I needed them in 3D space. A pulley line helped a lot for this...
Monday, October 10, 2016
Flexible anchor
 One of the reasons I chose to double up 2 2x10 beams for the supports was so I could drill a hole down the middle for a flexible anchor. A flexible anchor is needed so that when the wind blows your tree around, the tree can move without putting stress on the treehouse. If you just lag bolt all the beams to several trees, it can rip the whole house apart. Of course larger diameter trees are safer for this, and a single tree treehouse doesn't need to deal with flexible anchors. I decided to make the flexible anchor with a 5/8" thick eye-bolt, attached to a rigging twin clevis link, attached to an 8" long 5/8" thick eye-screw that was driven into the hemlock trees. This was a nice idea as you could turn the nut to move the beam up and down, getting it level in space - so important for the platform!!
Support beams up
While the first beam was on the lowest part of the treehouse, so easy to put up with a small ladder, the rest of the beams needed more trickery.
Kai was there to help me test it out for strength ;)


Since I was working alone (and most of the treehouse has been put up by my own two hands), I needed a way to get these heavy PT doubled-up 2x10 beams up into the air. I ended up constructing a pulley system with ropes, tied off on a nearby fence once the beam was lifted into place. This way I could attach the bolts with the beam hanging right where it needed to be.

Kai was there to help me test it out for strength ;)


Since I was working alone (and most of the treehouse has been put up by my own two hands), I needed a way to get these heavy PT doubled-up 2x10 beams up into the air. I ended up constructing a pulley system with ropes, tied off on a nearby fence once the beam was lifted into place. This way I could attach the bolts with the beam hanging right where it needed to be.

Choosing the trees and the first beam goes up!
Not that there were so many options in our backyard, but I wanted to 1) try and keep the treehouse completely off the ground (no posts), and 2) use more than 1 tree. I ended up choosing a triplet which was roughly isosceles (two sides equal length) and included a sturdy Oak, which is great for treehouse building, and two hemlocks (not so great as most here are being killed off by a wooly adelgid bug and so i'll have to keep an eye on it and spray them every other year or so).
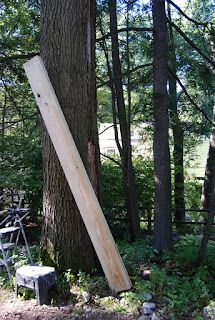
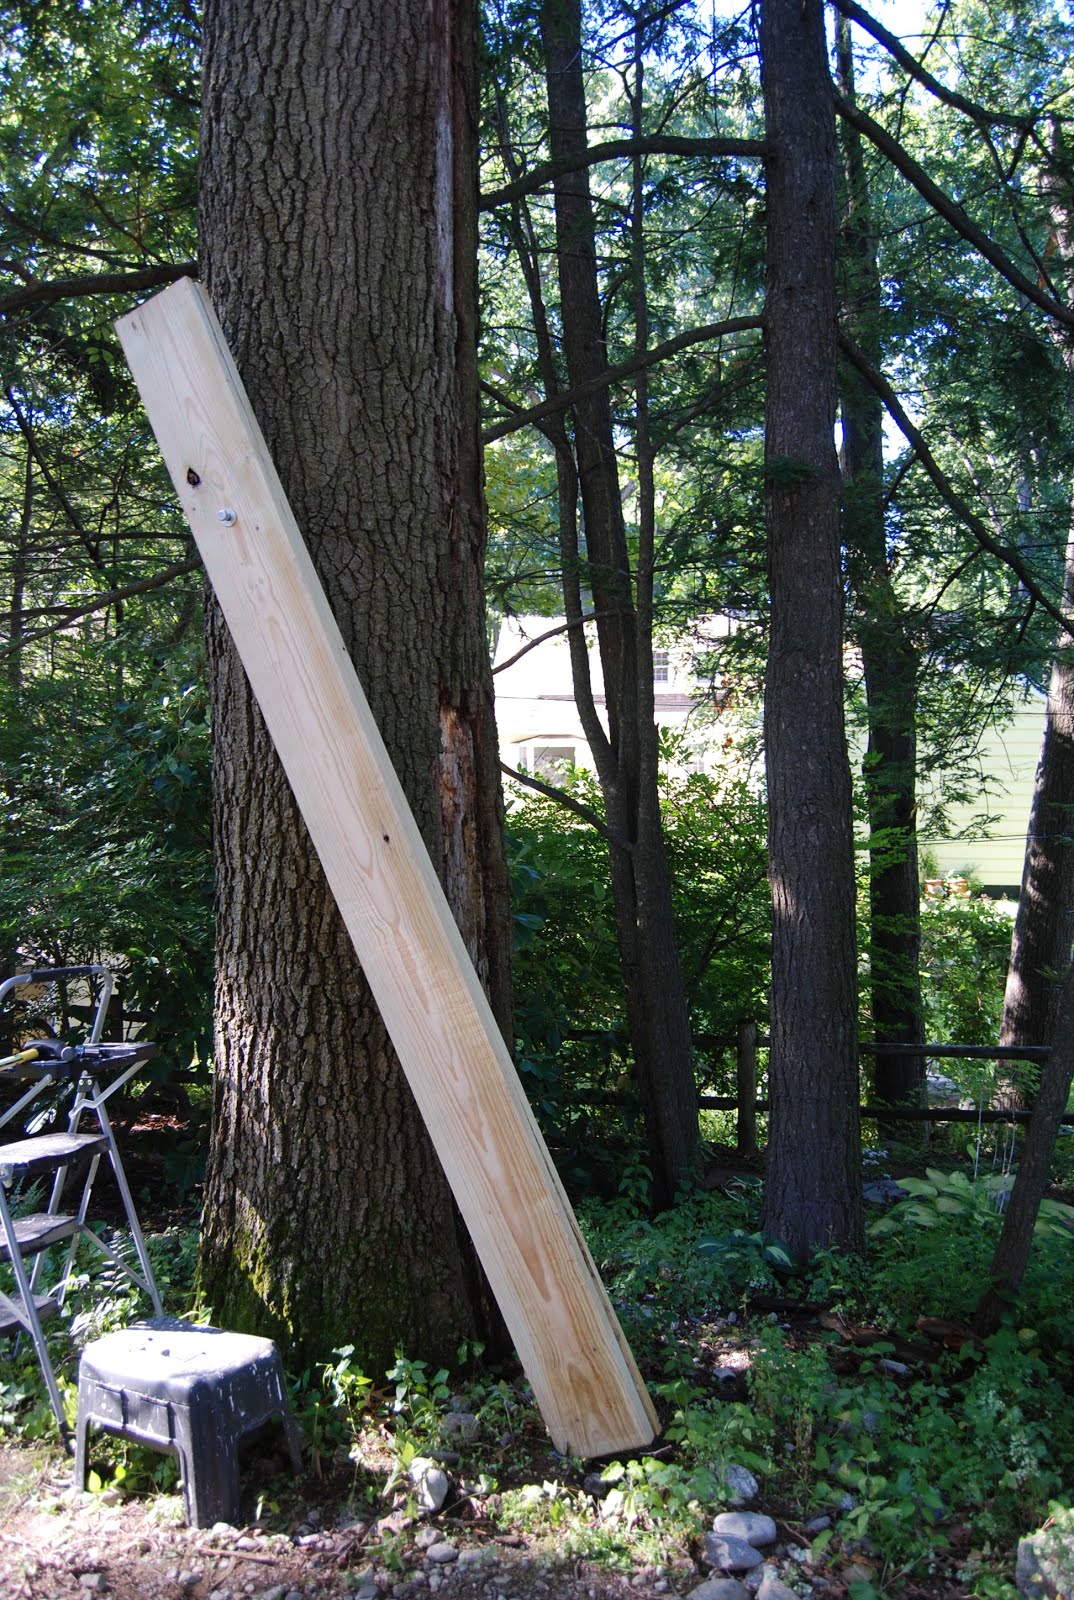
I took lots of measurements, planned out the platform support structure, which was doubled up 2x10 PT lumber, and put up the first beam in August 2014. I used a fixed anchor with a 10" long and 3/4" thick galvanized lag bolt (thickest I could find locally) driven deep into the oak tree. A special long auger drill bit, slightly smaller diameter than the bolt, was needed to drill into the tree first before wrenching and pounding the lag bolt in. Galvanized washers were placed on either side of the beams and it felt pretty solid once it was in place...

I took lots of measurements, planned out the platform support structure, which was doubled up 2x10 PT lumber, and put up the first beam in August 2014. I used a fixed anchor with a 10" long and 3/4" thick galvanized lag bolt (thickest I could find locally) driven deep into the oak tree. A special long auger drill bit, slightly smaller diameter than the bolt, was needed to drill into the tree first before wrenching and pounding the lag bolt in. Galvanized washers were placed on either side of the beams and it felt pretty solid once it was in place...

Sunday, October 9, 2016
Background reading
These books have been super helpful along the way:
Treehouses and Playhouses You Can Build by Stiles
which has great ideas on irregular treehouse construction and problem solving, especially for small treehouses... For example, they had some great ideas for flexible anchors (that allow the tree to move in a windstorm and not rip apart the treehouse), one of which i ended up using...

and the
Black & Decker The Complete Guide to Treehouses, which is kind of more "corporate" with lawyerly caveats, but also much more helpful and direct for a step-by-step process on how to build everything from the platform to a roof to a door...
Also, search for blogs which are always growing in number and have helpful ideas...
Treehouses and Playhouses You Can Build by Stiles
which has great ideas on irregular treehouse construction and problem solving, especially for small treehouses... For example, they had some great ideas for flexible anchors (that allow the tree to move in a windstorm and not rip apart the treehouse), one of which i ended up using...

and the
Black & Decker The Complete Guide to Treehouses, which is kind of more "corporate" with lawyerly caveats, but also much more helpful and direct for a step-by-step process on how to build everything from the platform to a roof to a door...
Also, search for blogs which are always growing in number and have helpful ideas...
Initial manifesto and mission statement
Ideally, with enough foresight, I would have started this blog at the initial seed of thought that drove me to build a tree house. But what fun is that, and who even knew if this idea would get off the ground... in my own backyard. But here we are and two years gone, the treehouse is well on its way.
So, construction began in the summer of 2014, when the solstice twins were 7 years old. Seemed like a good time to start. This being my first treehouse, I started by reading blogs and books (more on that later), and watching treehouse masters on animal planet for inspiration.
Why is this taking so freakin' long to build? Well, two main reasons: 1) i don't know what I'm doing, and 2) I want to go slow, think through how best to solve the problems that arise from trying to build around nature, and appreciate the steps along the way - the contemplative treehouse.
It's now October 2016 and this blog will catch up to "the present", and move forward along with the construction process. Have fun reading through this, but I'm also doing this for myself, so I better remember all the little things I've learned in building this magical treehouse (yes, they really are all magical, i know ;) )...
So, construction began in the summer of 2014, when the solstice twins were 7 years old. Seemed like a good time to start. This being my first treehouse, I started by reading blogs and books (more on that later), and watching treehouse masters on animal planet for inspiration.
Why is this taking so freakin' long to build? Well, two main reasons: 1) i don't know what I'm doing, and 2) I want to go slow, think through how best to solve the problems that arise from trying to build around nature, and appreciate the steps along the way - the contemplative treehouse.
It's now October 2016 and this blog will catch up to "the present", and move forward along with the construction process. Have fun reading through this, but I'm also doing this for myself, so I better remember all the little things I've learned in building this magical treehouse (yes, they really are all magical, i know ;) )...
Subscribe to:
Posts (Atom)